Guide to create the project in the IntelliJ IDE
The steps required to create the project in the Intellij IDE are described below.
1.Create a new project.

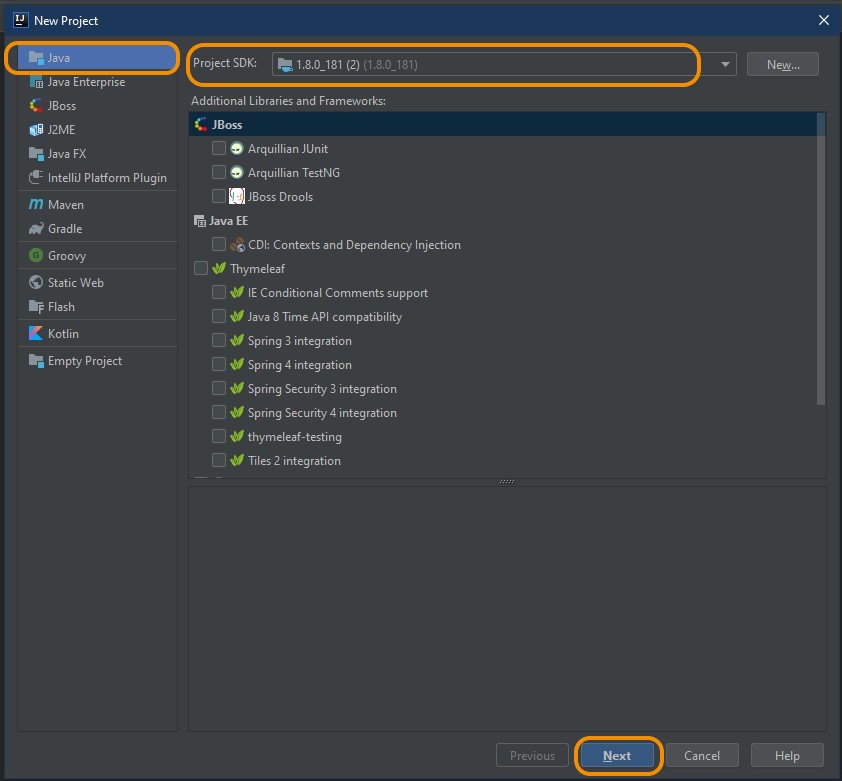
2.Select the Java project and a Java JDK. Press the button corresponding to next.
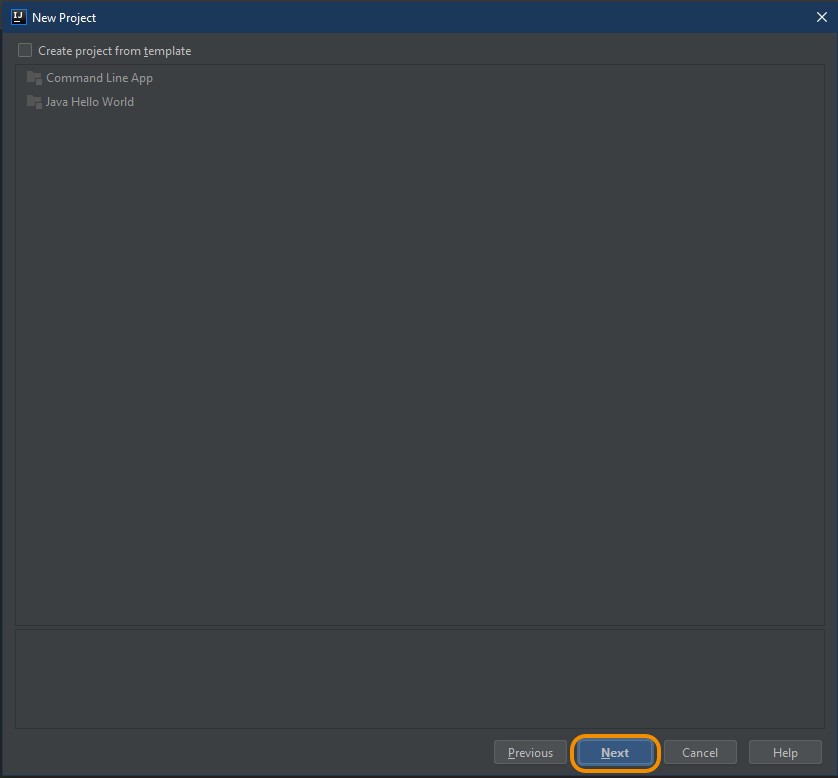
3.Avoid creating a template. Press the button corresponding to next.
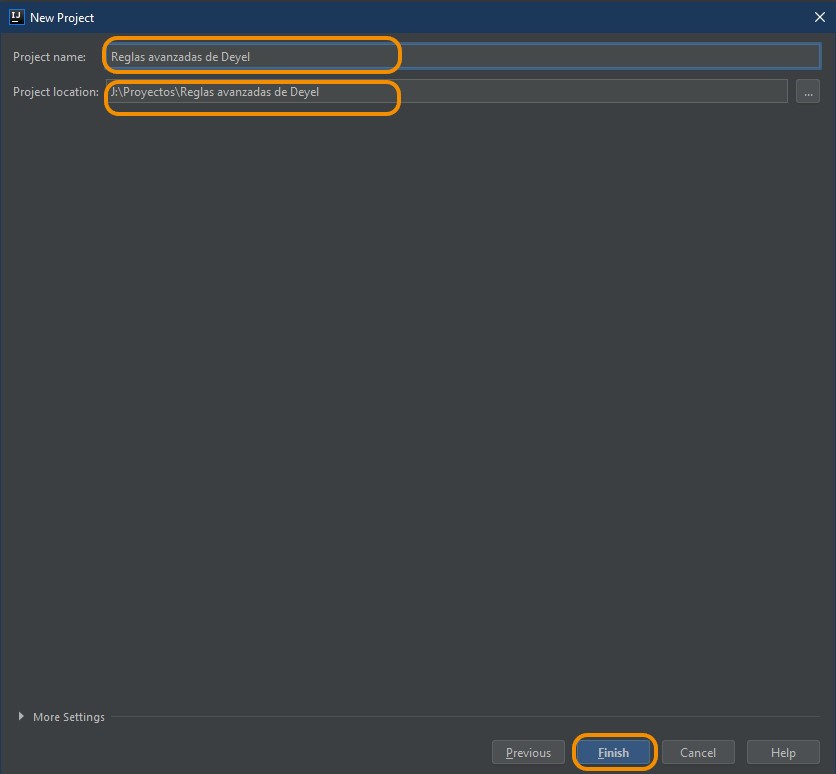
4.Specify the name of the project and its location. Press the button corresponding to end.
5.Create a classes folder and another lib folder within the project, using the "New" menu option.
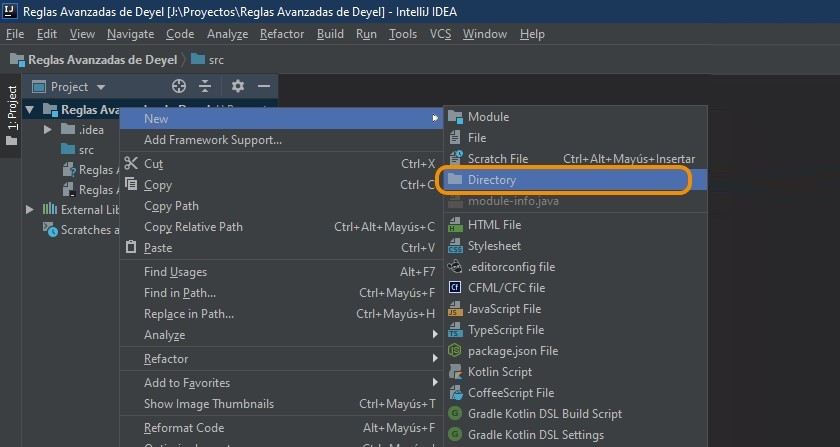
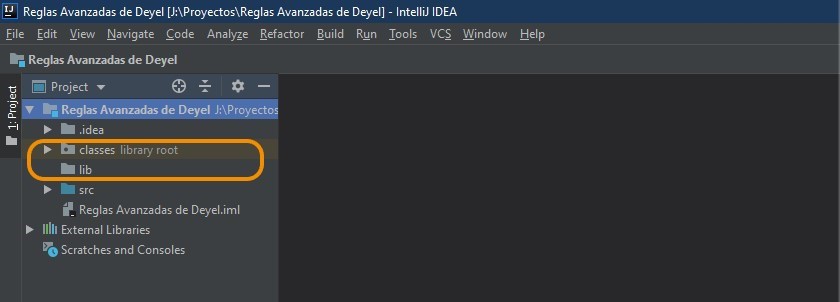
6.Display the created directories.
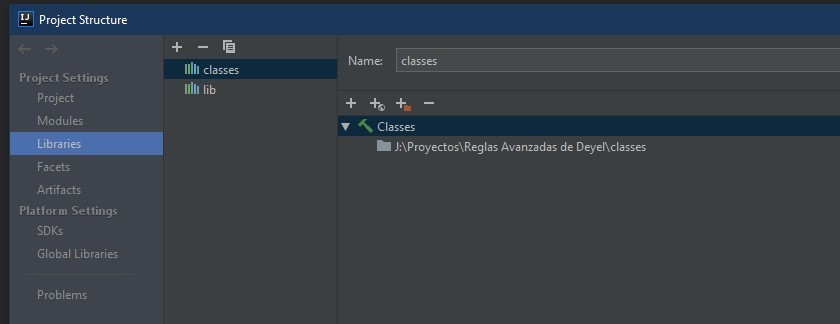
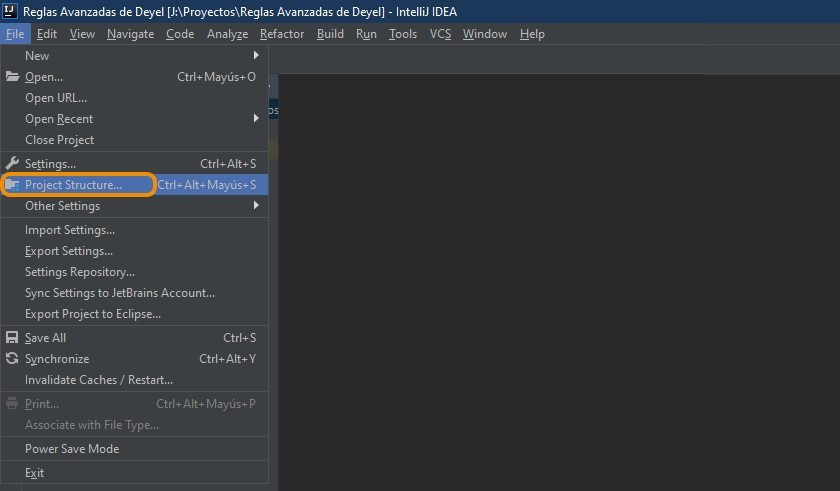
7.Include the folders created as part of the libraries to be used in the project. Select the "Project Structure" option.
8.Include the folders created as Java module type libraries.

9.Display the addition of both folders as libraries.
