Guide to create a project in Eclipse IDE
The steps required to create a project in Eclipse IDE are described below.
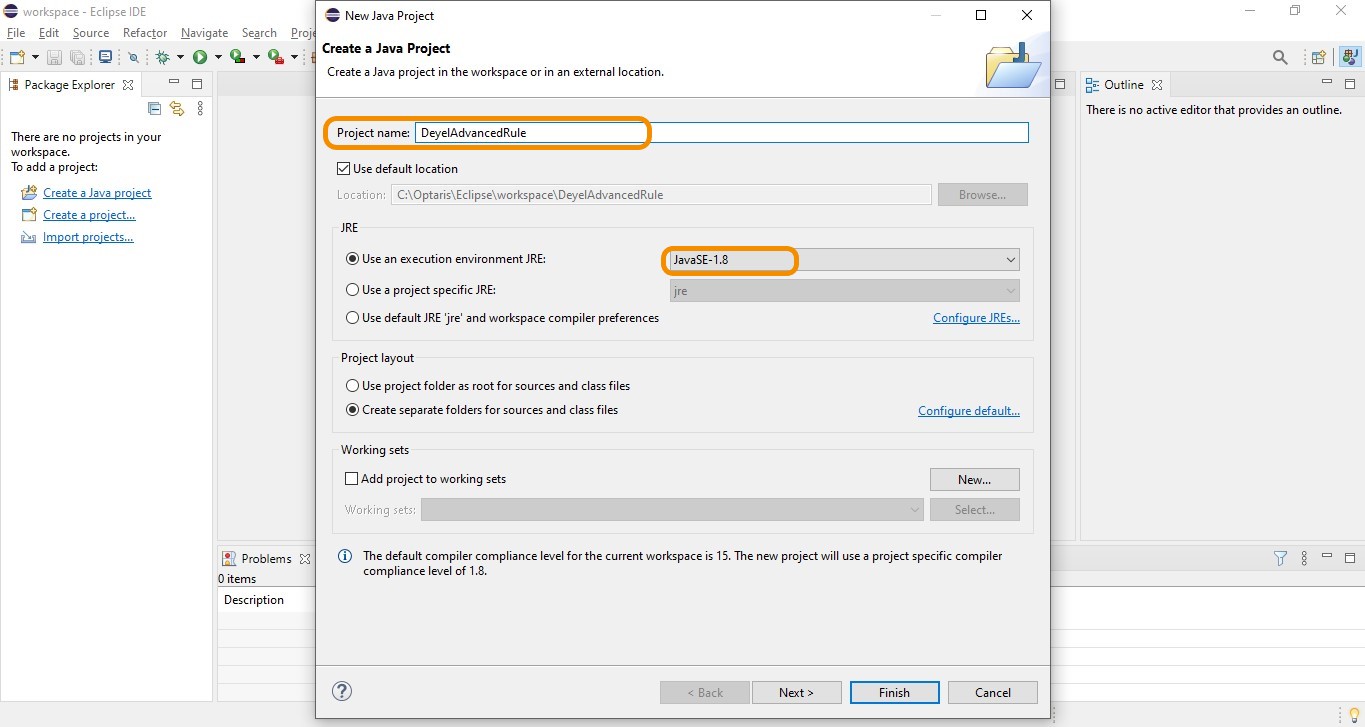
1.Create a new project.

2.Enter the name of the project and select version 1.8 as JRE.
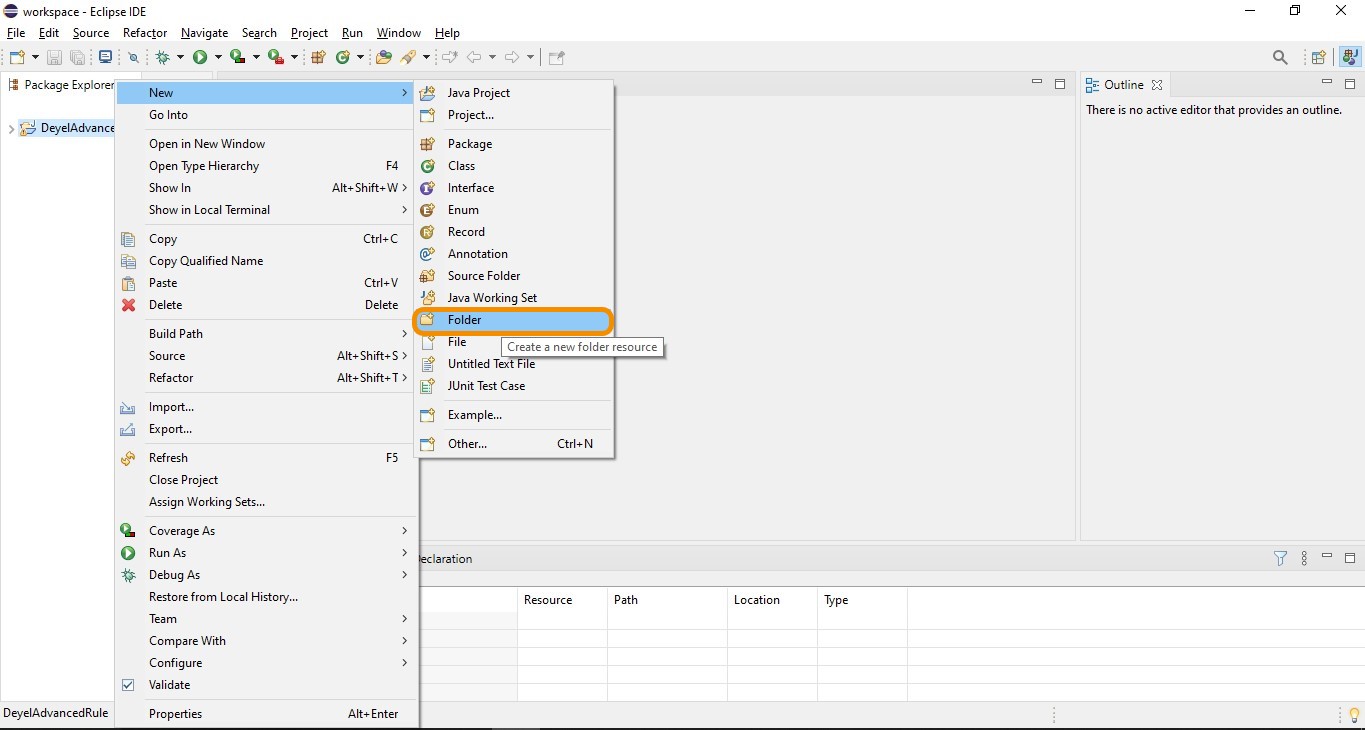
3.Create a folder of classes and another lib folder within the project, using the "New", “Folder” menu option.
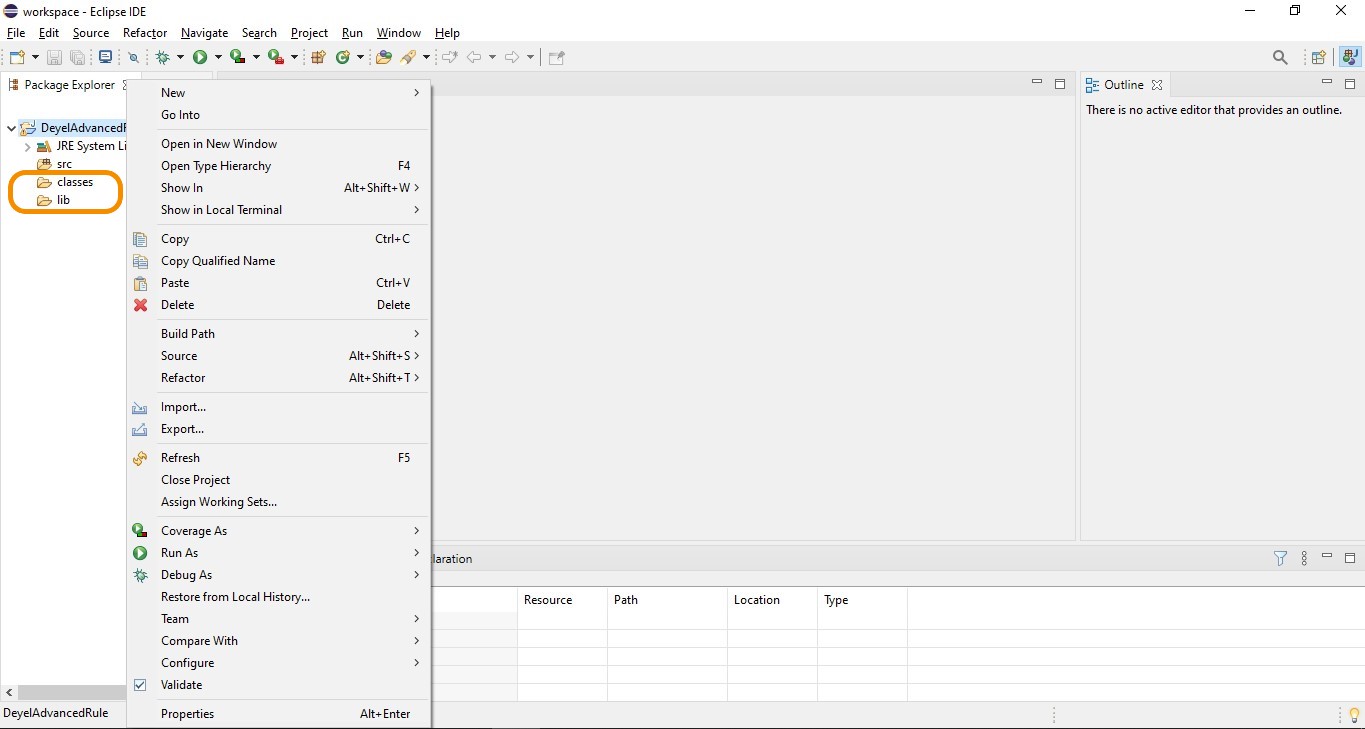
4.The created directories are displayed.
5.The Deyel SDK jar is copied to the IDE project, inside the lib folder.
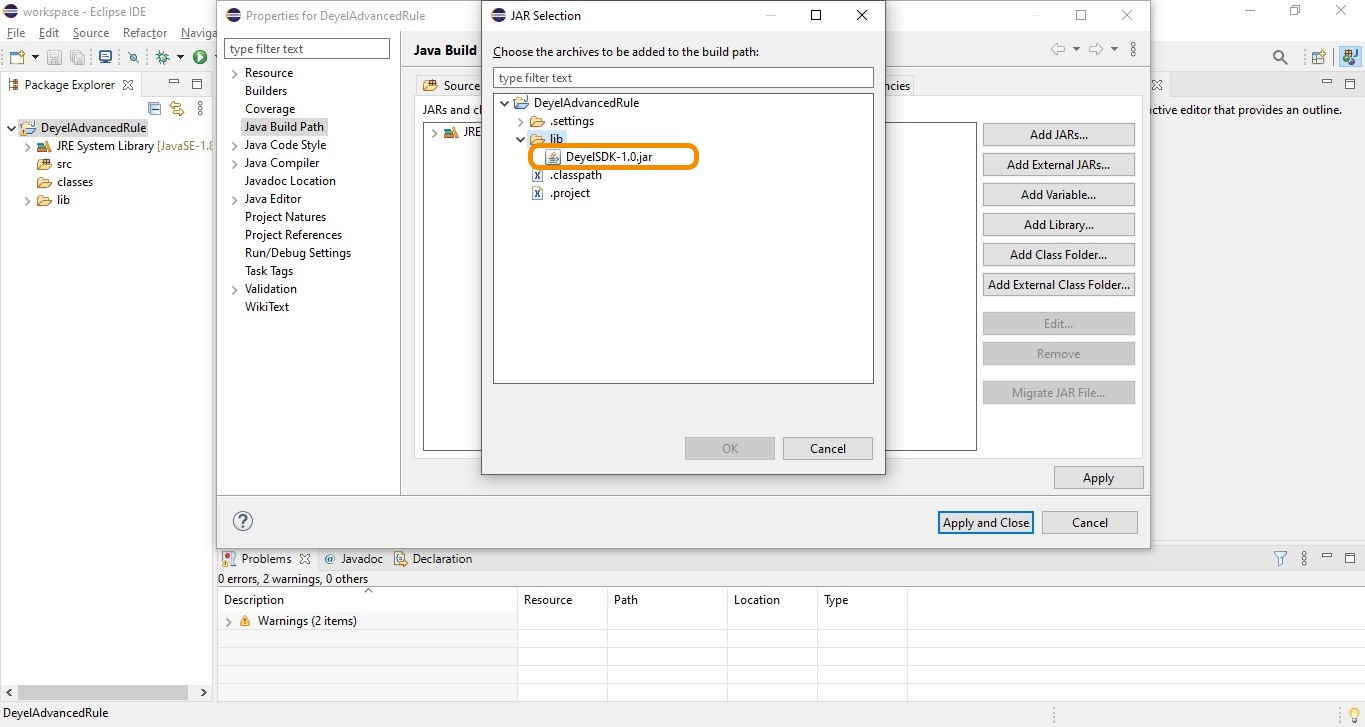
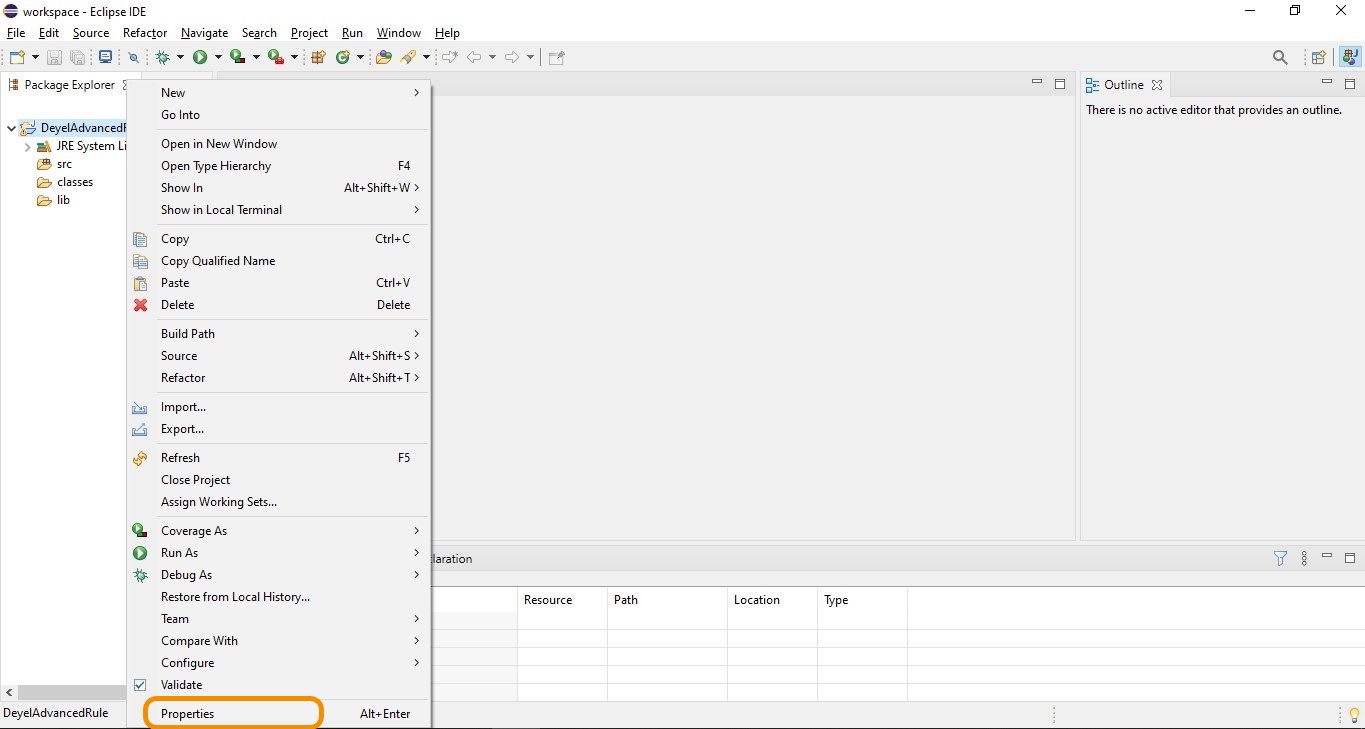
6.The folder of classes created as part of the libraries to be used in the project is included. The "Properties" option is selected and the folder is added.
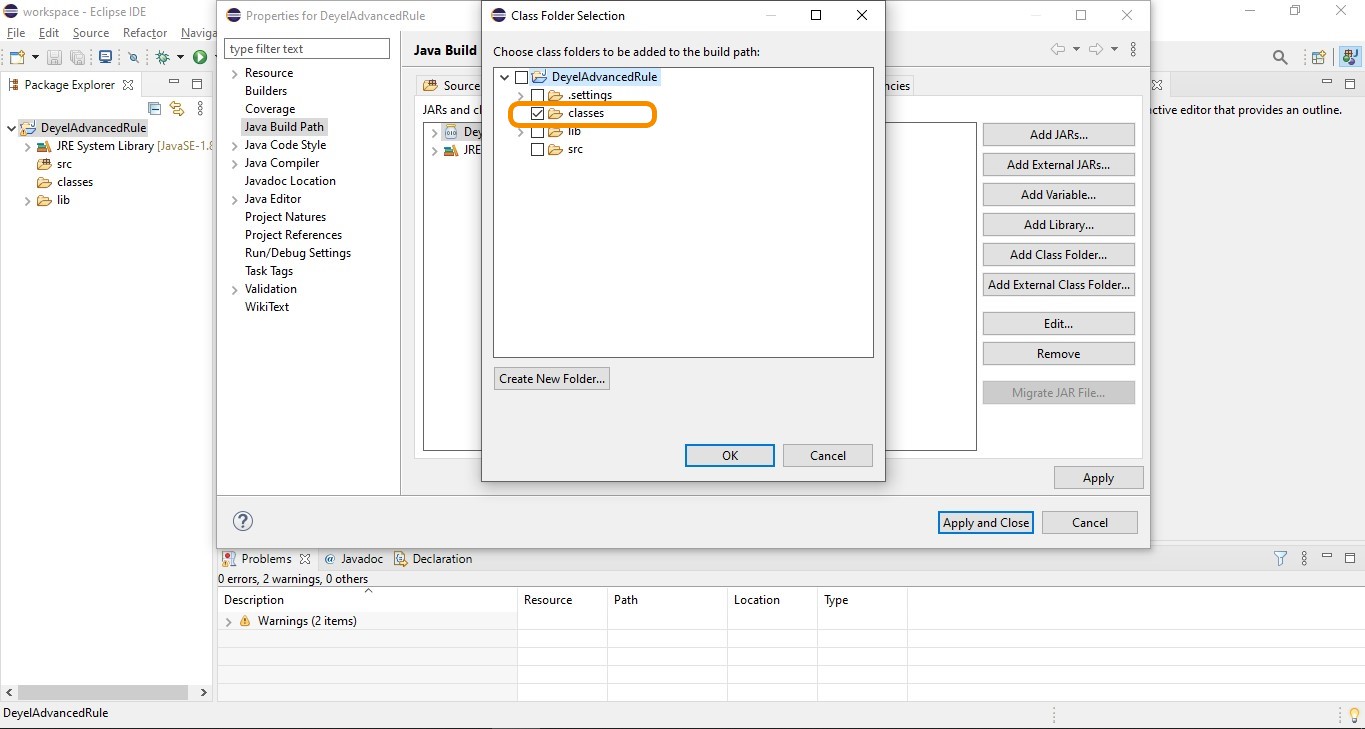
7.The Deyel SDK jar is selected and, as indicated earlier, it is included as an external jar to be part of the libraries used by the project.
